I started buying flashlights a few months back. I started with an Astrolux FT03 which comes with Narsil installed. Anduril is another widespread firmware for flashlights with more features than Narsil. There is even Anduril2 in the work and I decided to install this version on my FT03.
A few weeks later, I decided to buy another smaller flashlight. Looking at reviews, the Sofirn SC31 Pro sounded like a great choice for me. It comes with Anduril. Since I had Anduril2 on my FT03, I looked at how to flash it on the SC31 Pro.
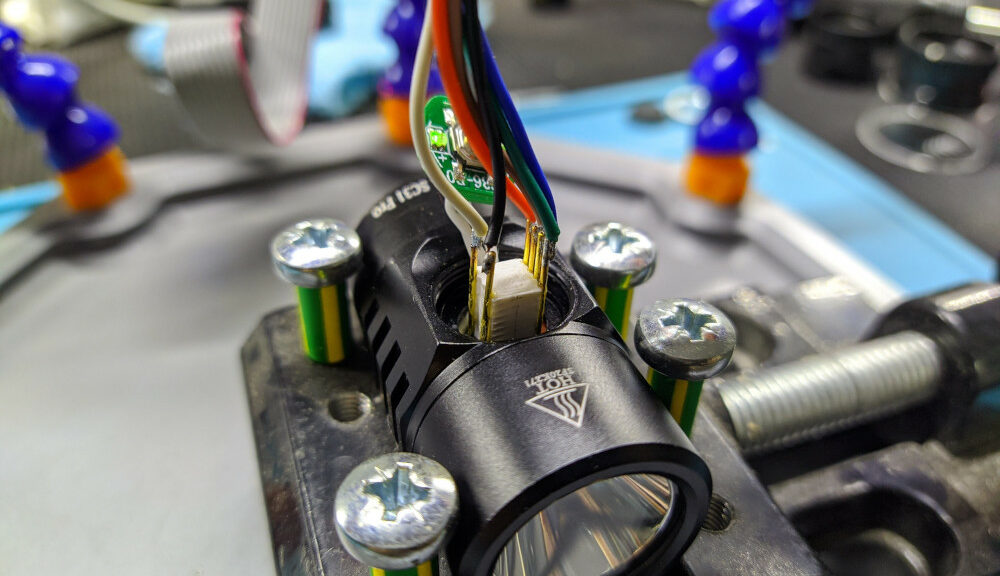
I found this post which sounded promising. As you can see here, you can access the ATTiny85 when removing the button. However, things are very very tight. Still, I decided to give it a try.
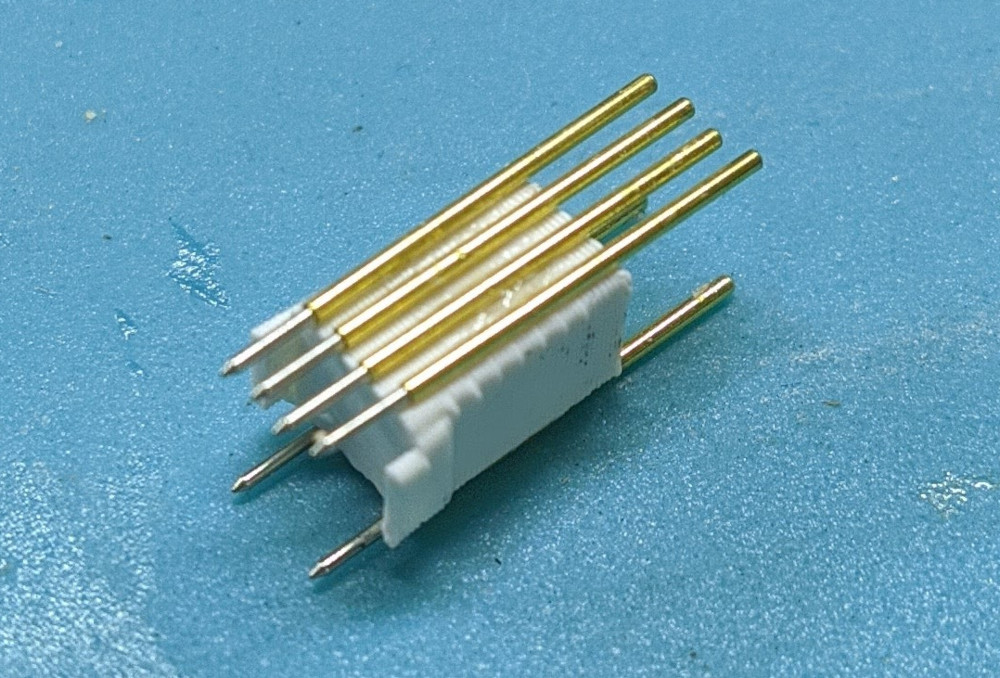
The resolution of my 3d printer is barely good enough to have something usable. But that did the trick. I glue the pogo pins with CA glue:
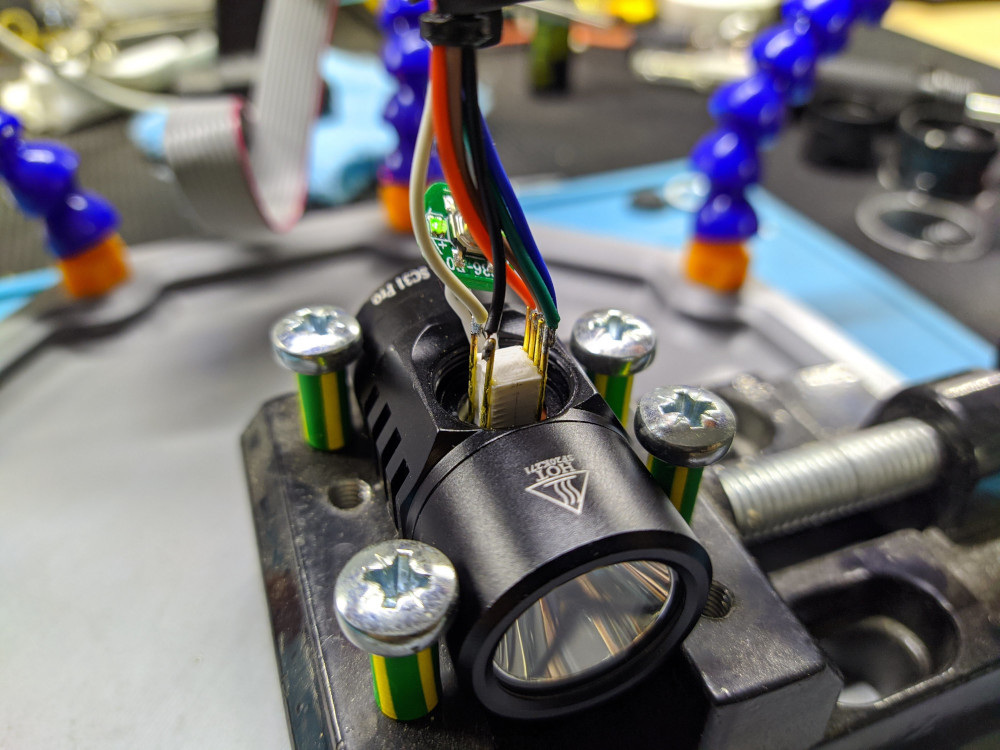
I then soldered wires to the pogo pins and installed the device on top of the ATTiny85. This was clearly the most critical part. My 3d print mount is not optimal and I had to hold it in place using the wires. I double checked visually that the pogo pins were not touching 2 pins and were more or less correctly placed.
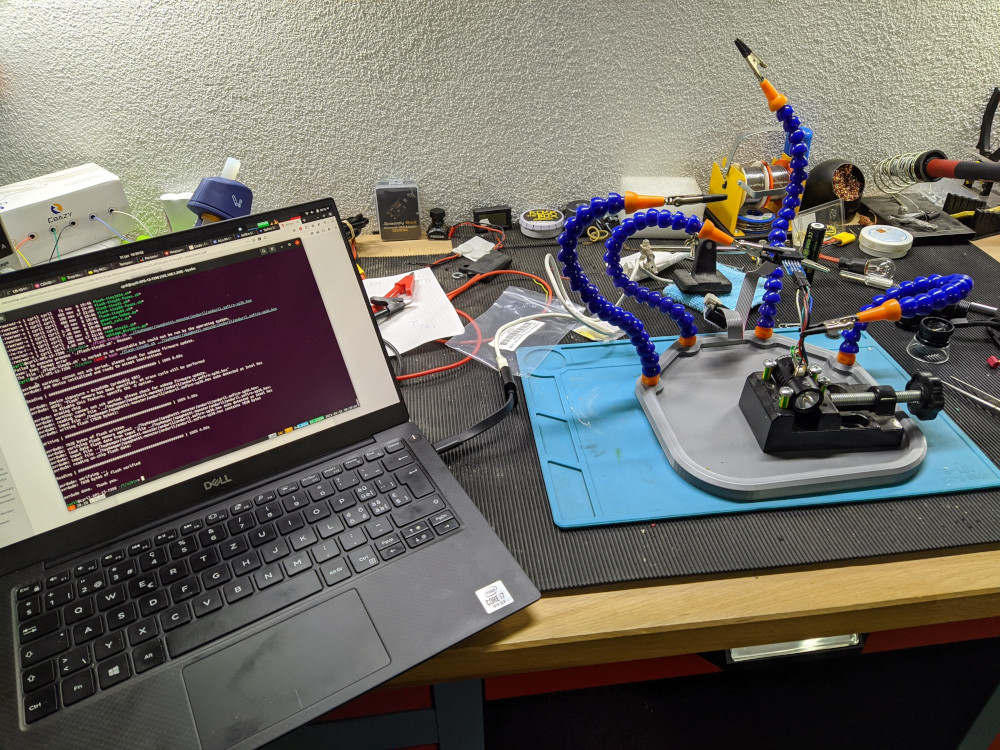
I plugged in my USBasp and could successfully access the ATTiny85 with avrdude. Flashing Anduril2 was then just a matter of a minute.
Based on the comments I found on budgetlightforum.com, Sofirn is using the same configuration for all its flashlights so I used cfg-sofirn-sp36.h to compile the firmware.
After flashing, I disconnected the USBasp, put in the battery and tested that everything was fine. I now have both my flashlights on Anduril2.
After over 7 years on CATV with Net+, I was getting bored of my very slow upload speed. Even though you can get good download speed on CATV, my provider only offers a ridiculous 25 Mbps upload speed on their top-end profile (500 Mbps download). Also to get 500 Mbps, you need a newer modem/router/firewall/wireless box that does not allow bridging. A clear no-go for me so I kept my older Cisco modem but was limited to something like 350/25 Mbps. When working from home, a decent upload speed really matters. Also many things are in the cloud today and it is always comfortable to be able to quickly upload some backups or pictures.
The other alternative in my case was DSL. Since we were using CATV, I never took my phone line in service. The Swisscom checker reported that, for my location, I could get 225/60 Mbps. Not a super great download speed but a higher one on the upload side. I decided to give it a try. I ordered Wingo DSL + 2x Wingo TV boxes. Wingo is super cheap and does not limit your bandwidth. You get the maximum that your line can provide.
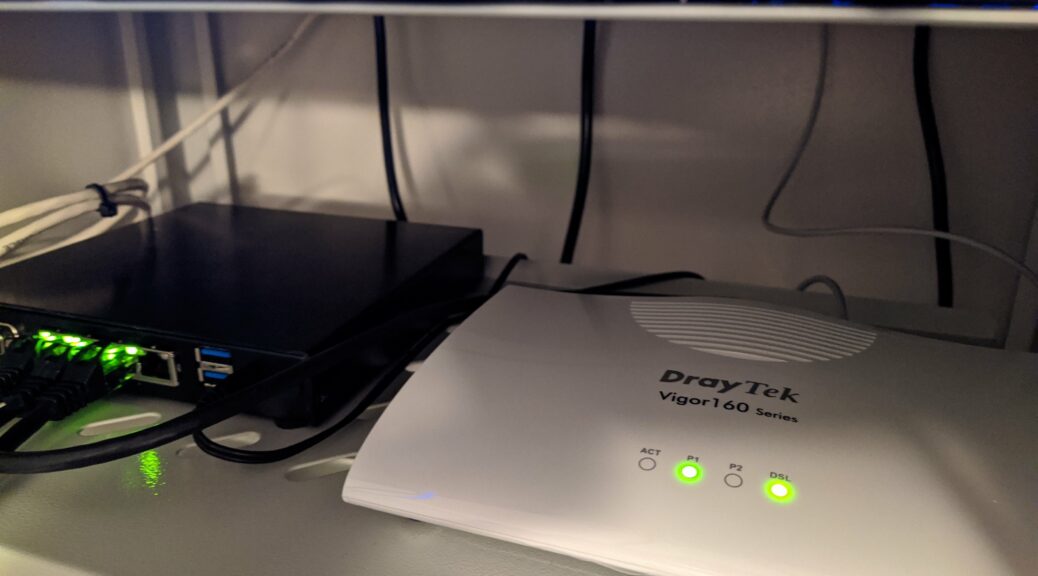
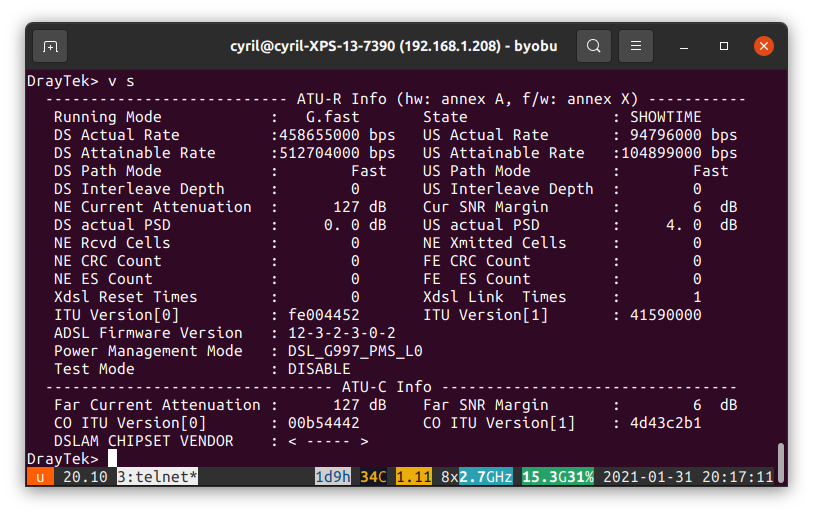
On January 11th, my line was activated and after checking that the wires were correctly rooted with the Internet Box, I switched to the Draytek Vigor166 modem I ordered a few days before. It immediately synced at ~450/95 Mbps on G.fast. That was a very nice surprise. To get the best speed possible, I crimped the RJ11 connector directly to the U72 cable.
Bridge mode
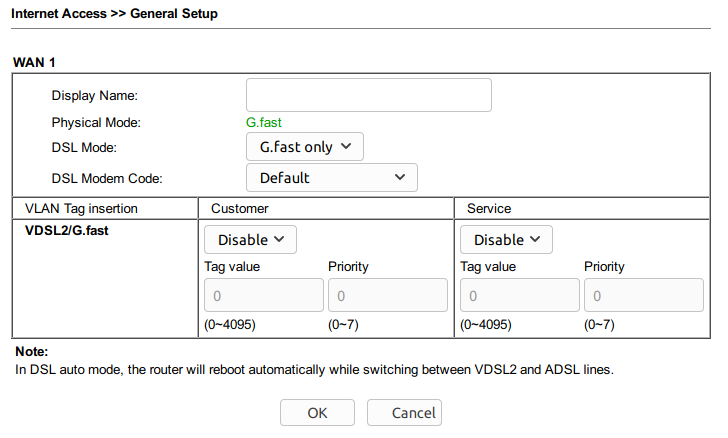
In order for pfSense (2.4.5-RELEASE-p1 when I did this) to get a public IP address, you have to configure the modem in bridge mode. The modem has a wizard to do this and there is no surprise here. You will just need to deactivate the VLAN tagging in the Vigor166 like shown below:
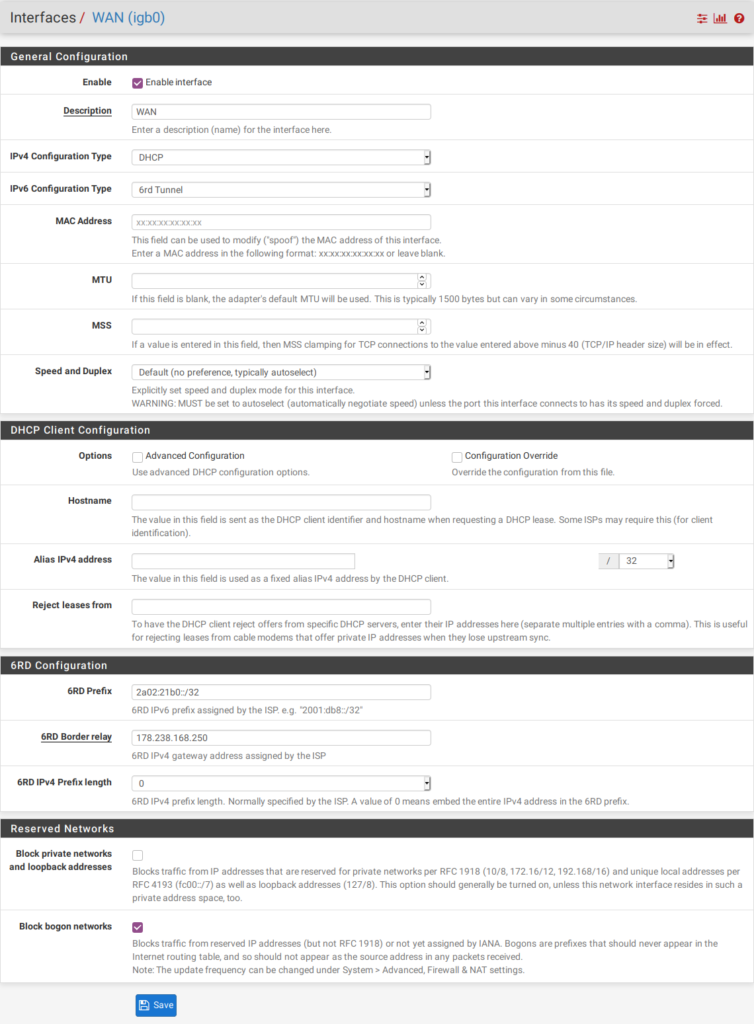
Also, there is no need to specify DHCP Option 60 for Wingo. Just keep things simple and configure 6rd while you are in the interface settings:
With this configuration, you should get an IP address from Wingo. However, you will likely get an IP address that cannot be routed on the Internet. Wingo/Swisscom uses CGNAT. Go to your myWingo account and activate the DMZ option. We do not use the Internet Box so this option will only have the side effect that we will now get a public IP address which can be routed on the Internet. Just renew your DHCP lease and everything should be fine.
Wingo TV
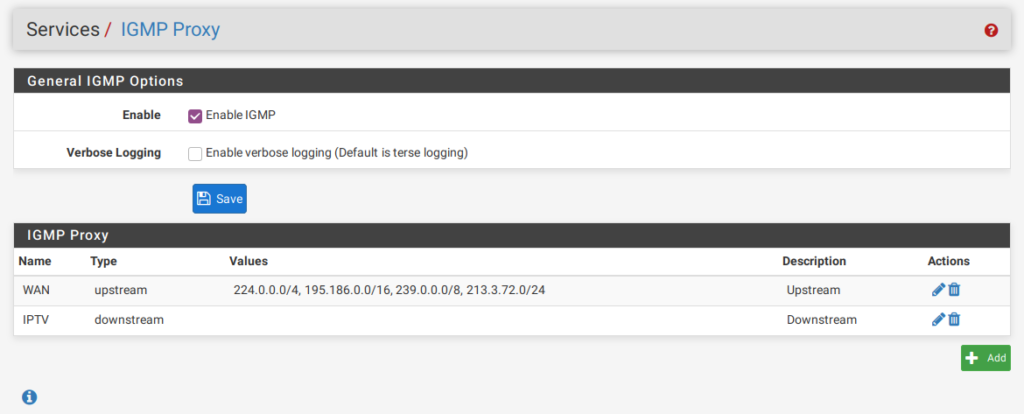
Wingo TV requires the IGMP proxy in pfSense to be configured properly. Add the following networks to upstream (not sure they are all required):
224.0.0.0/4
195.186.0.0/16
239.0.0.0/8
213.3.72.0/24
Edit: 213.3.72.0/24 seems to be the only required network to add as upstream.
Also add two rules on your WAN interface to allow IGMP and UDP traffic:
UDP from 213.3.72.0/24 to 239.0.0.0/8. This is for the live streams via multicast
All IGMP traffic. Be sure to activate the Allow IP options.
This should be enough to have live and replay TV.
IPv6
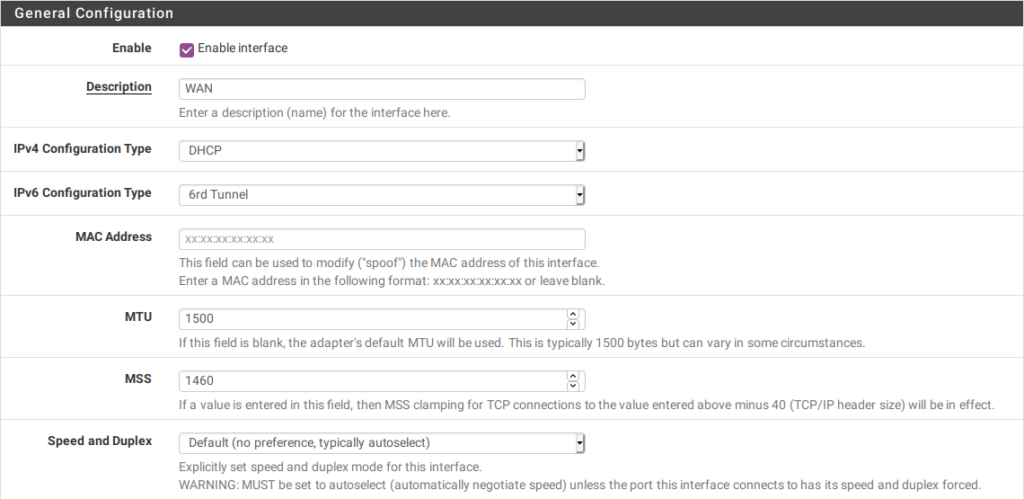
I advice you to upgrade to pfSense 2.5 (I’m using the 2.5RC at the moment). It contains a few fixes related to 6rd. Especially, the MTU is now set correctly to 1480 (MTU of the WAN interface – 20 bytes) on the wan_stf interface. Still, connectivity to some web sites (like swisscom.com or sbb.ch) does not work properly. This is discussed extensively here. Also there is a bug in pfSense which wrongly compute the MSS clamping value for IPv6. I solved the problem by setting MSS to 1460 for the WAN interface:
EDIT: The MSS clamping bug has been fixed in pfSense 2.5.1. MSS can now be set to 1480.
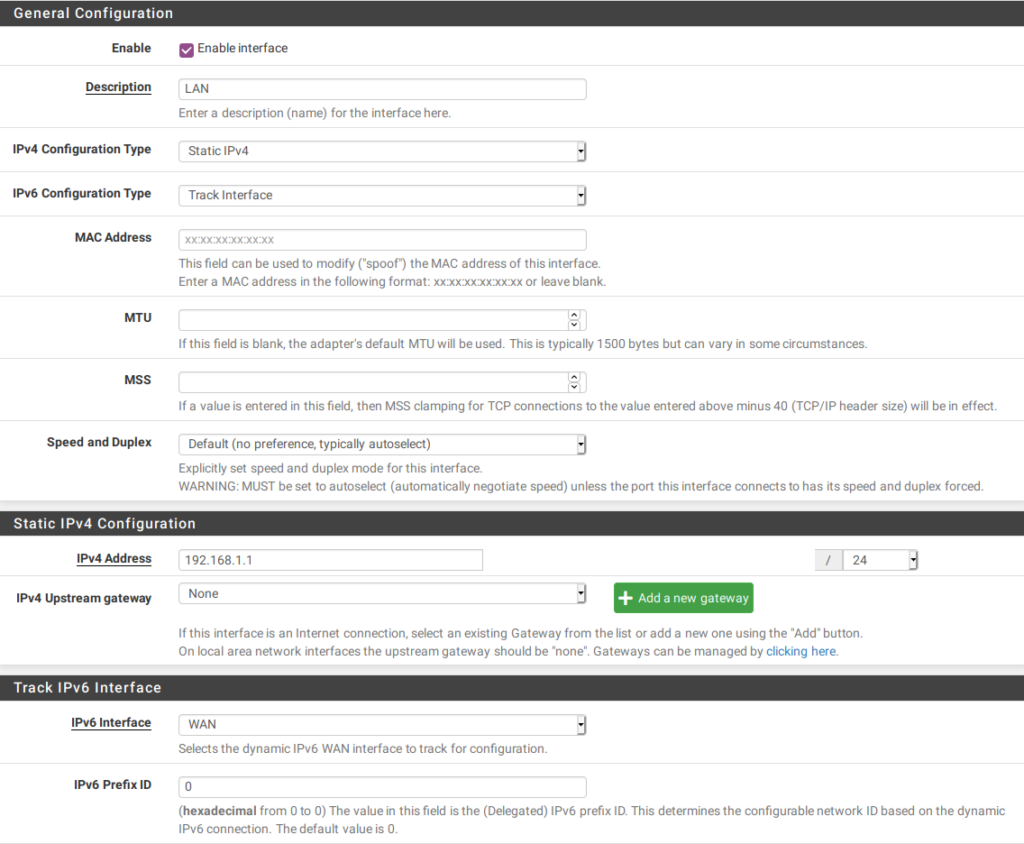
Configuration of your LAN is then straightforward. For IPv6 Configuration Type, use Track Interface:
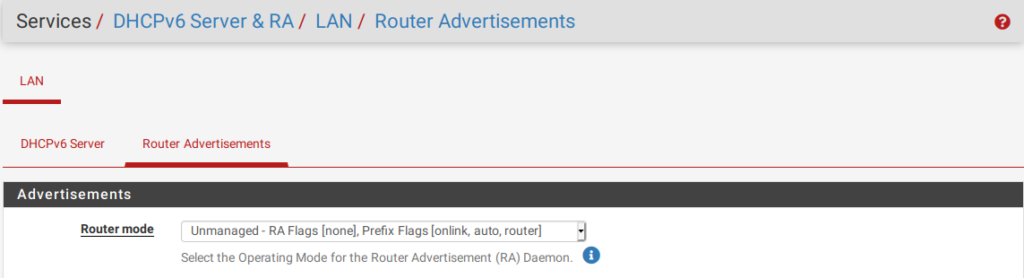
Unfortunately, Wingo only provides a /64 so cannot simply assign different subnets to your internal network. In my case, I only enabled IPv6 on my LAN interface and kept my other subnets IPv4 only. Enable RA for LAN and you should have IPv6 connectivity:
I also added a firewall rule on WAN to allow all ICMP traffic on IPv6 toward LAN. IPv6 relies a lot on ICMP and this traffic should not be blocked.
Access Vigor166 management
This was probably the most painful thing to solve. As soon as the modem is in bridge mode, you cannot access the web or telnet management console anymore. The first solution I used was to connect the second port of the modem on a free physical interface on my pfSense router. However, this is a bit overkill to just access the modem from time to time.
After some trial and error, I finally managed to make the Vigor166 accessible via the WAN interface.
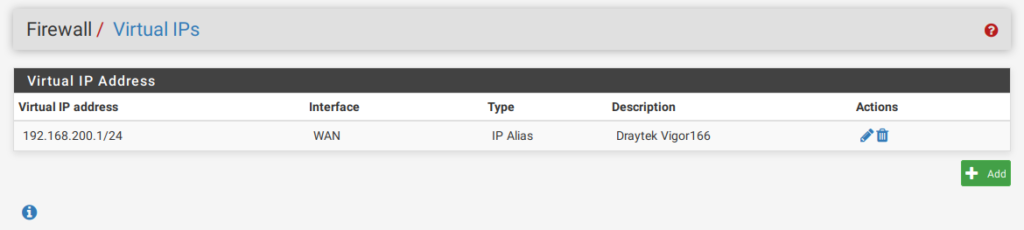
I configured my Vigor166 with a LAN address of 192.168.200.10 (netmask /24). This network is a complete different one from my internal networks. I then created a virtual IP on the WAN interface with an address of 192.168.200.1/24:
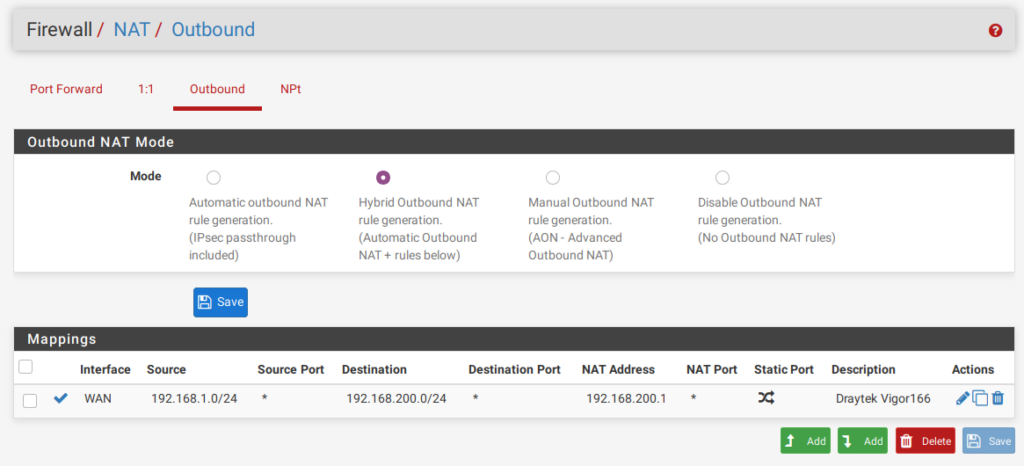
After doing this, I’m able to ping and access the Vigor166 from a pfSense shell. However, access from my LAN does not work. The solution is to use NAT like below:
I’m accessing the modem from my 192.168.1.0/24 network and this rule will actually rewrite the source address to make it look like it comes from 192.168.200.1. This way, there is no static route to setup on the modem. The idea came from reading this recipe in the pfSense documentation.
Apply the changes and you can now access the management interfaces of the modem via 192.168.200.10.
Conclusion
I have this setup for more than 2 weeks and it works perfectly. I’m very happy with my new speed and the latency is even better on DSL than on CATV (~5 ms compared to ~15 ms up to the first/second router). The only downside so far is that I cannot use my Samsung remote control to control the Wingo TV box. The IR extension port is disabled in the firmware so you are forced to use the original remote control.